
|
Home Methods Tools Workbench Emerging Links About Contact Galleries: Stone Wood Other History of sculpture    |
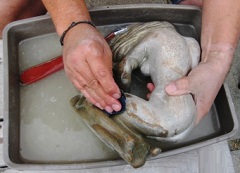
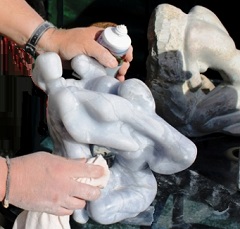
Stone CarvingBefore you start carving you have to secure your piece to stop it rolling around the bench as you work it. If the block has a flat base you can use bench dogs to stop it skidding, otherwise, use sandbags to hold stone blocks in place. Sandbags also allow you to easily rotate or invert the piece.Traditionally, the first tool to use is a Point, hit with a lump hammer. This will quickly take off a lot of material. This is the physical, quite macho stage as you really have to hit it hard. • If the hammer skids off at this force level it could seriously hurt your left thumb, so be sure to wear thick gloves. As you get close to the shape ease off the force and be careful not to angle the point more than 45° - digging in too steeply will give a white bruise deep into the stone. A less traditional approach is to start in with stone saw, or an angle grinder with a stone cutting disc. This approach actually reduces the chances of splitting the stone down a fissure or crack. The next tool is a Claw, hit with a dummy mallet. This also takes out quite a lot of stone and gives a lot more accuracy than the point, but leaves your surface with deep furrows which must be reduced with a flat chisel. After the flat chisel, use a large rasp to smooth out the last of the furrows and to get the convex shapes more rounded. This gives more control than using power tools, and it doesn't throw up as much dust. To scoop out a concave hollow or put a hole through the stone, drill into it with masonary drill bit. Then, use a round edged chisel to cut towards the drill hole, working all round it. To smooth out the hollow use a spatula rasp, this is very effective on softer stones such as serpentine. Finally, use an 80-grit sanding pad to get rid of the rasp marks. When all your shaping is done it's time to concentrate on the finished surface. Do the finishing with wet'n'dry paper in a bowl of water, or if the piece is too large, use a sprinkler. The water stops the paper getting clogged and makes the dust sink. Change your water as you work through the grits. Start with a course 80 grit to remove the riffler marks. Next, use a 120 grit to remove the scratchiness left by the 80, then use a 240 grit to remove the 120 grit marks. Continue up through 400 grit, and 800 grit. On soapstone you may want to go right up to a 1,200 grit. • Don't move on to the next grit too soon. If you missed some 80 grit scratches and only find them when you're on 800 grit you'll never get them out unless you go all the way back... A bit like The Big Snake in snakes'n'ladders. Finally, with soft stones such as alabaster, you can seal the surface with stone polish and buff it up to a soft sheen, or to a glassy finish. This brings out the colour of the stone, and stops it absorbing grease from little fingers. • Soapstone buffs up to a beautifull shine, often with very attractive patterns, but, it is VERY easy to put a scratch in that shine. Even a sharp fingernial will do this, so give your buyer some wet'n'dry paper. |
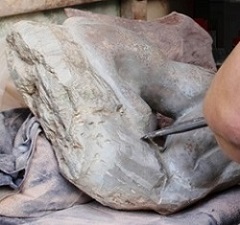
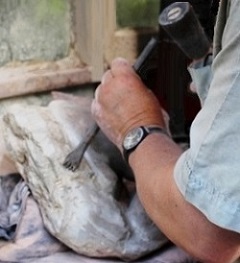
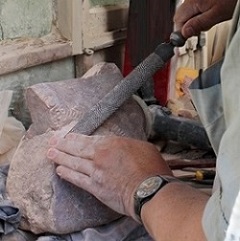
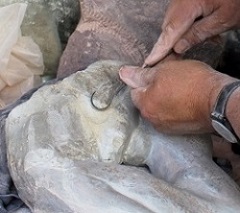
|
||
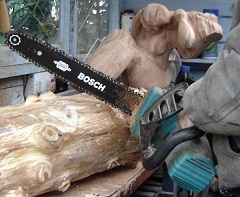
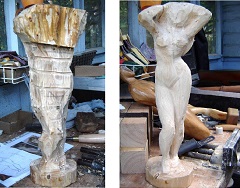
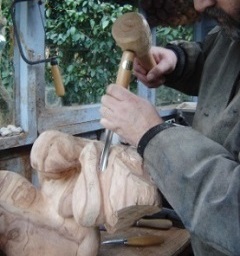
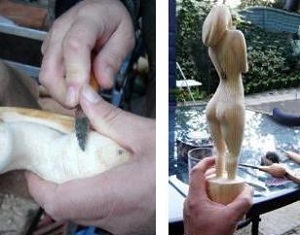
Wood CarvingSmall wood carvings can be held steady in a vice, and larger pieces can be be immobilized by bench dogs or sandbags. Alternatively, if you have holes in your bench for bench dogs you could put large screws through the bench into the base of the piece.It may not be very traditional but the best way to start roughing out a log is with a chainsaw, or an angle grinder with a saw blade. These will cut out large chunks of wood quickly while avoiding the risk of splitting the wood down the grain - if you're carving a log with knots and branches it's not always clear where the grain is going. A 1½ inch no.5 gouge hit hard with a rubber mallet will also take out a lot of wood. To avoid splitting the log down the grain, make a series of deep chainsaw cuts across the grain - this will give you control in what is essentially an unpredictable operation. No two logs are the same. When the bulk of the wood is off, switch to smaller gouges and a round wooden mallet. Further shaping can be done with a large rasp - a sharp Italian rasp can take off a lot of wood, also without risk of splitting the grain. Grinling Gibbons would turn in his grave. Next, you can start adding detail using small gouges, blockcutters, a Sloyd knife and italian rifflers. For detail work on small pieces I find it natural to hold the piece in one hand and rotate it as I work with a knife and blockcutters. Be careful to cut away from your fingers, and try to wear a glove on your left hand. Hand carving a small piece of wood is quiet and relaxing - you can sit in your favourite garden chair and listen to birdsong as you whittle away. • No matter how careful you are, you'll get occasional cuts and splinters. If you're seriously afraid of pain, take up modelling in clay. Hmm. |
|
|||
|
When modelling in clay you can usually undo a rash change, and get back to a point where things looked right.
But, when carving wood, once it's gone, it's gone.
This makes you re-design on the fly, and create a new form based on what is still possible. This often works out suprisingly well, but, not always. Sometimes version 2 will have great possibilites you'd not previously seen. You need to be able to distinguish whether fate has been kind to you, or not. The more time you invest in a piece the harder it is to accept when things are going from bad to worse. How can you stop yourself wasting vast amounts of time ? Simple.... |

|
|||